In this post we will provide an overview of the system used in the subsequent ARTY posts to check we can communicate with various peripherals.
All scripts and c code for these examples can be found at
https://github.com/thewindop/fpgaArtyExamples
All FW is derived from the Xilinx examples which can also be used to expand your own experimentation.
So why use Arty?
- Its lower power and less complex than a Zynq for logic only with no ARM.
- If you need a processor the MicroBlaze is available and if you use IPI its very quick to get it up and running.
- You get Vivado system edition which gives you access to ILA’s (more in subsequent posts)
- Simplest Vivado entry point, Spartan7 also just announced with Vivado support
- IPI gui for building designs
- Inbuilt Verilog/VHDL simulator (also in webpack)
- Arduino & PMOD headers to allow reuse of 3rd party add on modules.
- Its an FPGA, you can move your code to Zynq (Snickerdoodle, Parallella, Zed board) if you need to.
Why is Vivado so good?
- IP Integrator (IPI) is a great graphical tool for quickly stitching Xilinx and your IP together
- Simulation, synthesis, implementation and debug tools, everything you need to design test and implement you own logic.
- Fully scriptable using TCL, the EDA standard Tool language
Personally I think its awesome and I am looking forward to the first Spartan7 board too.
This design was to allow us to experiment with the various peripherals required to add Arty to future cAno projects. Its fast to synthesise and implement to bitstream and easily expandable if you want to add remove IP.
We have intentionally left the DRAM of this design, and the Microblaze memory used can also be adjusted in the supplied bd.tcl
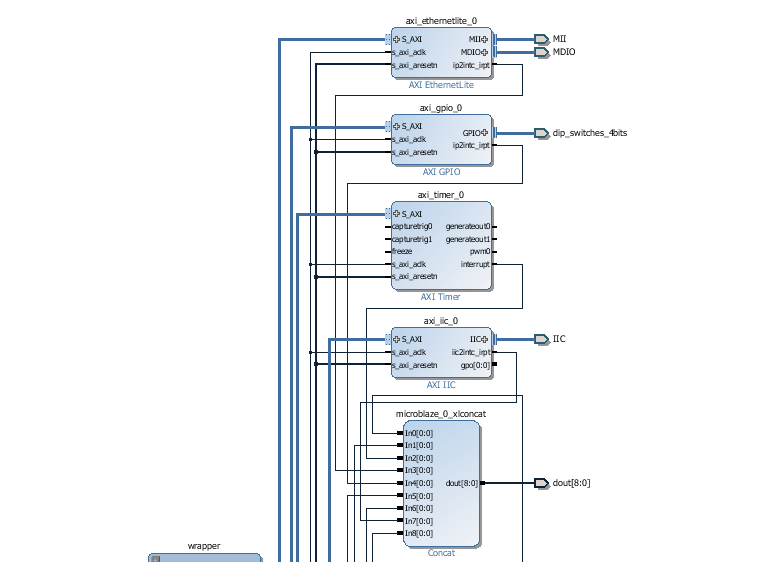
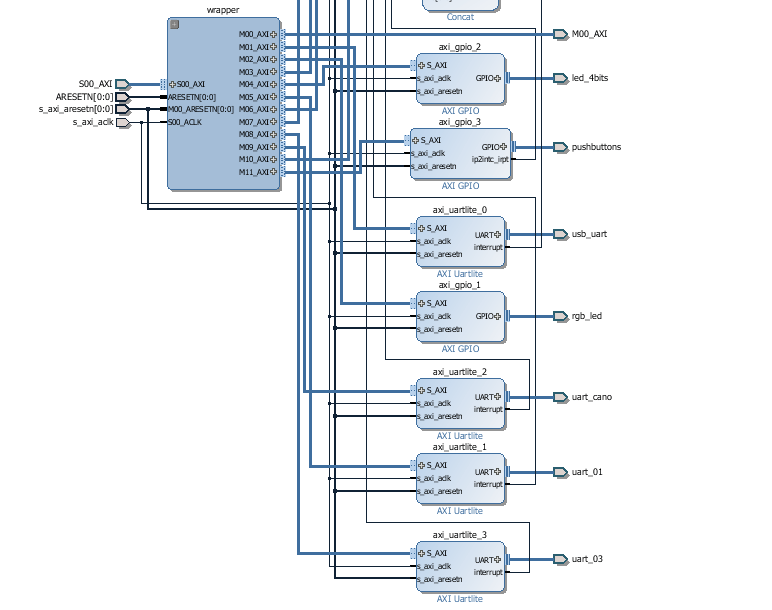
We have ethernet, I2C, 4 uarts (uart lite 3×9600 1×115200 baud), a timer and gpio for all the onboard LED and switches.
Build scripts for windows can be found on Github. On windows locate these in a c:arty/ directory. Any other locations will require the paths in the scripts to be updated.
Alternately the board.tcl can be run within an open Vivado project. You will also need to add the constraints file as a source.
Once loaded the following design should be visible in the IPI window. It’s divided into three sections, the clock reset block, the micro blaze block and the IO block, which contains all the external interface IP blocks.
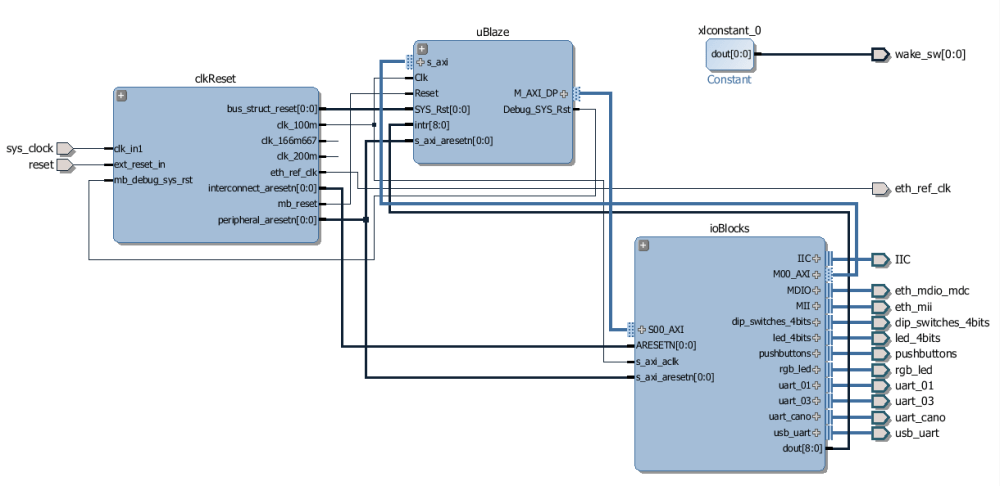
The clock reset block generates several clocks. Note the 100 MHz is used by the main system. The 166 and 200MHz can be used if you add the DRAM controller.

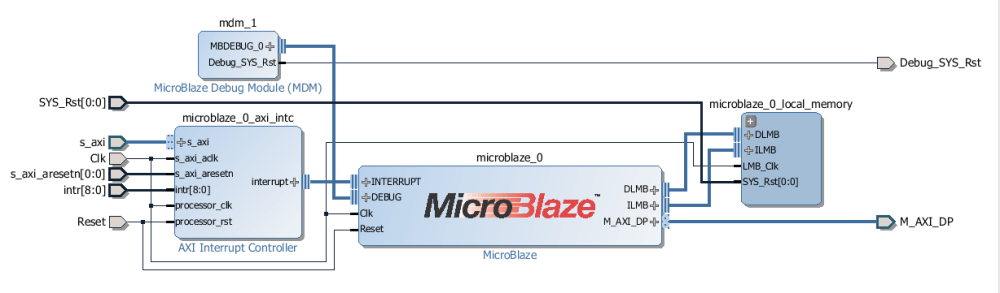
The uBlaze should contain the following blocks.
Finally you should see the following blocks in ioBlocks. Note that all the GPIO, Ethernet, IIC and USB_UART pin constraints are all provided by the Arty board file. A separate cons.xdc is provided for the remaining 3 UART’s and the constant we drive.
A great Arty blog is available at adiuvoengineering.com. If you are unfamiliar with using Vivado this is a good reference along with the Digilent Arty tutorials.
